Building a Personal Website - Part 1: Using Lume
Good to know before reading: basic HTML/CSS, running shell commands, editing files
You can check out the source code for this website on GitHub.
The situation: It was the middle of the Covid lockdown. I had some free time, and I knew enough HTML, CSS, and JavaScript to cobble a few pages together and list "HTML/CSS/JavaScript" on my resume. I had some functional CSS code, and an AWS S3 bucket with a custom domain name.
Enter: an early version of my personal website:
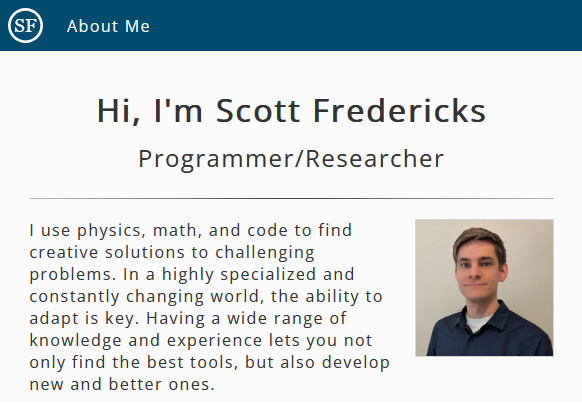
It's okay. It gets the job done, and it shows potential employers that I know how to Google things.
But I don't just want my website to be okay. I want it to be pretty neat. So let's fill up some space in the old GitHub contribution graph and learn some new tools.
Choosing the Tech
Lume for Static Site Generation
I don't need any server-side logic or persistent state management, so a static site will do the trick. See Lume's article about static sites for more justification. Using a more complex web app framework might provide some good practice, but it would be overkill for the current size of the site.
I could continue using raw HTML and CSS, but that's no fun. I might also want to add a blog at some point (right now, for instance). So let's try out a static site generator.
There are a lot of options, but I ended up using Lume for a few reasons:
- I wanted to try out Deno (I've used Node before, and it works, but it can be a bit slow and cluttered).
- I wanted the option of using TypeScript and React for any client-side logic in the future.
- I don't want the final build to contain any unnecessary JavaScript, other than logic I explicitly add myself.
GitHub for Project Management
I already have experience using GitLab for Agile-style project management, but I'd rather not host a server or pay for a project of this size.
GitHub is similar enough to GitLab, and most of my personal code is there already. Their free repos and issue tracking are more than sufficient for the job. I don't mind making the code public (that's kind of the point of a dev portfolio), and in this particular case I don't really care if GitHub uses my code to train Copilot. For more sensitive code bases, I might instead use a self-hosted GitLab server or a paid option.
For any coding project you plan to work on more than once, I recommend using some kind of Git workflow to help with managing your changes. In theory you could just do everything on a single branch, but having a separate issue for each change and having a branch for each issue makes it much easier to track progress over time. Having a searchable and taggable list of issues also makes prioritization easier when planning what to work on next.
GitHub Pages for Hosting
Since I'm already using GitHub, I might as well use their hosting service called GitHub Pages. It's free, it doesn't have ads, and it supports using a custom domain.
The previous version of the site used an AWS S3 bucket. That worked fine and was fairly inexpensive, but if I can host the site for free, that's even better. Especially if I (hopefully) end up getting more traffic later on.
Setting Up Lume
Installation
OK, let's get started by installing Lume and setting up the project skeleton.
First, we'll need to install Deno. On Windows, using non-admin PowerShell:
irm https://deno.land/install.ps1 | iex
Conveniently, this also adds deno to the path. Much simpler than installing node, in my opinion.
Then, from within the project folder (using any shell):
deno run -A https://lume.land/init.ts
This starts an interactive prompt with a few options for creating the deno project. I went with "Basic" setup, and chose not to install a CMS. Note that we're using Lume 3.1.2; the installation options may differ slightly in other versions.
This creates _config.ts for Lume and deno.json for Deno.
Next, I'll install the optional Lume CLI so that Lume commands are a bit shorter to type. This way we can just run lume instead of deno task lume:
deno install --allow-run --allow-env --allow-read --name lume --force --reload --global https://deno.land/x/lume_cli/mod.ts
Finally, from VS Code, I'll install the Deno and Vento Template Support extensions for syntax highlighting. Vento is just a templating tool used by Lume that we'll explain later.
Lume Config
Now I'll set some default configurations for our Lume project. This is all handled in _config.ts, which is documented in the Lume docs.
There are three things we care about for now:
- Adding a
srcdirectory so that Lume only looks for source files there. We don't want to include the outer README.md or other top-level files in the build, since those have other purposes and shouldn't show up in the final site. - Having the server open a browser by default when we run
lume -s. - Disabling the debug bar from the site.
To do this, we use the following for _config.ts:
import lume from "lume/mod.ts";

const site = lume({
  src: "./src",
  server: {
    open: true,
    debugBar: false,
  },
});

export default site;
The other defaults are fine for now.
If the .ts extension makes you nervous, don't worry. TypeScript is just a superset of JavaScript, and we don't need any TypeScript-specific features here.
Creating the Project Structure
Adding a Page
Now that Lume is configured, we can start adding content and defining a basic folder structure.
First, we need to create the src folder where everything will live.
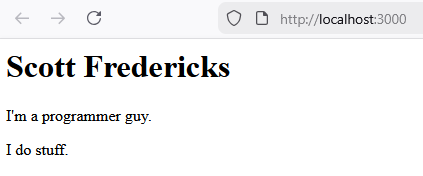
Within it, Lume will automatically discover .md files and generate HTML using them. To start, let's create a simple src/index.md file, which will be used to generate the main index.html file (the landing page) for the site:
# Scott Fredericks

I'm a programmer guy.

I do stuff.
Now we can view our site by building it and starting a server using the lume -s command. We can also set the server to automatically watch for file changes using the -w flag, so that whenever we change our source or config files, the website updates immediately in the browser. This command will run in the background and list any file updates as we go:
lume -s -w
This generates a very basic HTML file at the site root and opens it in the browser:
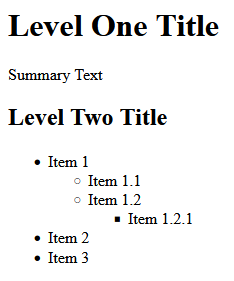
If you're not familiar with Markdown, it's just a simple markup language that's well-liked by developers. It's easy to edit from a text editor, and it's easy to reason about how the rendered version (what you see in the browser) will look based on the text version. For example, this Markdown:
# Level One Header

Summary text

## Level Two Header

- Item 1
  - Item 1.1
  - Item 1.2
- Item 2
produces this HTML:
<h1>Level One Header</h1>
<p>Summary text</p>
<h2>Level Two Header</h2>
<ul>
  <li> Item 1 <ul>
      <li>Item 1.1</li>
      <li>Item 1.2</li>
    </ul>
  </li>
  <li>Item 2</li>
</ul>
and looks like this in the browser:
Great, our offline website works! However, it's pretty ugly. We should add some CSS to make it less ugly.
Before we can do that though, we need to understand how Lume handles layouts, templates, and other resources. This is because in Lume, CSS files are handled like any other resource.
Applying a Layout
Lume uses a JavaScript-based templating engine called Vento. If you've never used a templating tool before, the basic idea is that you create template files that are similar to the final output. Within the template files, you can write code-based expressions instead of the actual content. Then, the templating engine "renders" the final output by evaluating the expressions and injecting their literal string values into the document.
For example, the following template code:
<p>Hello, {{ name }}. Your age is {{ currentYear - birthYear }}.</p>
might produce this HTML code, depending on the values of name, currentYear, and birthYear:
<p>Hello, John. Your age is 21.</p>
Here, anything within the double curly braces is treated as JavaScript code and converted to a string literal, which gets output as raw HTML. Note that the template doesn't "know" anything about the output format, so you can use expressions to generate HTML tags, comments, or any other kind of HTML code. You just need to be mindful about how you use escape characters between formats.
This makes it easy to re-use parts of a file that stay the same (like the boilerplate elements in an HTML file) while making the main content dynamic (like the text and images for your blog articles). This becomes more relevant the more pages you have in your site. If you need to update the document layout for 20 similar pages, then templating allows you to update a single template file instead of editing all 20 pages separately.
Let's use a template to define the basic HTML structure that most of our pages will use. Template files are expected to live in the _includes folder, so let's create a file called src/_includes/main.html.vto:
<!DOCTYPE html>
<html lang="en">
  <head>
    <meta charset="UTF-8" />
    <title>Scott Fredericks - {{ title }}</title>
  </head>
  <body>
    <h1>Main Layout - Added by Vento</h1>
    {{ content }}
  </body>
</html>
The final HTML file should have more info in the head section, but that can be added later.
Note the .html.vto extension. We could have called the file main.vto, but using .html.vto makes it easier to see that the output file type will be .html.
Within our template, we use the variables title and content. title is just a regular variable that we will define within the index.md file. content is a built-in variable that contains the rendered string value obtained by converting the source file (Markdown) to the template file type (HTML).
Next, to have our index.md file use this layout, we can specify the built-in layout variable at the top of index.md like so:
---
layout: main.html.vto
title: About Me
---
You can define whatever other variables you like and use them within template files the same way we use title and content.
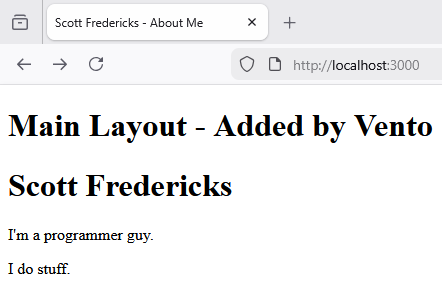
Now the page includes the h1 element added by the layout, and uses the page title defined at the top of index.md:
Default Data
Lume also has a way to define directory-level default variable values, so that we don't need to include the layout line for every file. We can do this by creating a file named _data.yml in the directory that we want to apply the defaults to. Let's create src/_data.yml:
layout: main.html.vto
Now we can remove the layout line from the top of index.md, since a default value will be pulled from _data.yml. If you reload the page, you'll see that the layout is still applied.
These defaults extend to all child directories by default, but they can be overridden by putting another _data.yml file within the child directories you want to override. For example, if you wanted a blog directory where all of the articles use a different layout, you could create src/blog/_data.yml:
layout: blog_article.html.vto
All files in that directory would then use the layout defined in src/_includes/blog_article.html.vto, instead of using src/_includes/main.html.vto.
Adding Resources
Adding CSS
OK, now we know how to use (and re-use) HTML. Let's add some CSS.
Other than the option to use templating, CSS in Lume works the same way it does in standard web dev. Let's add a CSS file at src/css/main.css. The exact file path doesn't matter; I just like having a dedicated css folder because it keeps our CSS files organized. For now, we'll just specify the font:
body {
  font-family: monospace; /* Gotta look like a developer */
}
Now we can link the CSS file in the usual way within the HTML template file, by adding a link element inside of the head element and specifying which CSS file to use:
<head>
  ...
  <link rel="stylesheet" href="/css/main.css" />
  ...
</head>
By default, Lume only looks for certain file types (like .md and .yml) within the source directory, so we need to specify any other files (like CSS) that we want to add. To do this, we add a line in _config.ts:
site.add("/css");
This recursively adds all files in the src/css folder.
Now css/main.css should be added to the _site folder after building, and we should see the updated styling in the browser:
Note that when we apply styling, we want to target the HTML elements in the final output (in the _site folder), rather than the contents of the source Markdown files. Our CSS code only "knows about" the rendered HTML, not Markdown or any other Lume-specific features.
So, for example, to target all level 1 headers in CSS, you would use h1, not #. So your CSS would look like this:
h1 {
    ...
}
and not this:
# {
    ...
}
If you get confused, just remember that the final website consists of everything that gets output to the _site folder, and nothing else. You can inspect the contents of these files to see whether things are working the way you expect them to.
Adding JavaScript
JavaScript works more or less the same way as CSS; we can add all JavaScript files within a src/js folder, and add these files to the build using another line in _config.ts:
site.add("/js");
Then we can reference these js files using the <script> element like we normally would. For example:
<script src="/js/my_script.js"></script>
Adding Images
Images are slightly different since we are using Markdown instead of HTML. It's still pretty simple though.
Just like we did with CSS and JavaScript, we need to add the image files to the build, using another line in _config.ts:
site.add("/img");
Then, we can add images within md files using the following syntax:

This will insert an <img> tag into the output HTML using a relative URL. You can also use an absolute URL if you're referencing an external image from another site.
Here, we expect an image to exist at src/img/filename.png. Note the / at the beginning of the file path, which is necessary to reference the website root (for our local build, that means the _site folder). We can also specify custom alt text, which is used in the event that the image does not load correctly.
Adding Blog Articles Programmatically
Great, now we have a basic project structure, and we know how to work with all of the relevant file types. But in order to get the most out of a static site generator, we should try generating some dynamic content at compile time.
A good use case for this is a blog, where adding a blog article .md file should not only create a new URL in the site, but also update the list of blog articles on the main /blog page.
To do this, let's create a basic layout for our blog list page at src/blog/index.html.vto:
---
title: Blog
layout: main.html.vto
url: /blog/
---

<h1>Latest Articles</h1>

<!-- Articles will go here -->
This will be rendered to <domain name>/blog/index.html, where <domain name> is whatever our public site URL is. By adding url: /blog/, we can properly utilize pretty URLs so that the user-facing URL is just <domain name>/blog/.
To designate which files are blog articles, we'll add a blog_article tag to every article .md file that we want to appear in the list. We'll also add a date variable that we can list at the top of the article and use for sorting. Here's the top of an article .md file:
---
title: "Building a Personal Website - Part 1: Using Lume"
date: 2026-01-05 12:00
tags: [blog_article]
---
Note that JavaScript has some quirks when parsing dates. If we had just used "2026-01-05", then the date would be rendered as "January 4th, 2026". Adding 12:00 for noon gets around this and correctly renders "January 5th, 2026".
Also note that if the title includes certain characters like :, you'll need to wrap it in quotes.
In order to work with dates more effectively, let's add the Lume Date plugin by adding a couple of lines to _config.ts and restarting lume:
import date from "lume/plugins/date.ts";
...
site.use(date());
Lume provides a search.pages function that generates a list of pages based on tags and other properties. We can use this within our template to get all of our article pages and sort them based on date.
It would also be nice if our articles were grouped by year, without needing to define each year ahead of time. We want each year to have its own <h2> element, with articles published in that year appearing in a list underneath.
We can do this using a combination of templating and JavaScript logic. Here's the complete src/blog/index.html.vto:
---
title: Blog
layout: main.html.vto
url: /blog/
---

<h1>Latest Articles</h1>

{{# Get list of articles based on tag, in descending date order #}}
{{ set articles = search.pages("blog_article", "date=desc") }}
{{ set currentYear = null }}

{{ for article of articles }}
  {{# Check whether the year has changed #}}
  {{ set articleYear = article.date.getFullYear() }}
  {{ if articleYear != currentYear }}
    {{# Close previous years if this isn't the first year #}}
    {{ if currentYear != null }}
      </ul>
    {{ /if }}

    {{# Create a section for the new year #}}
    <h2>{{ articleYear }}</h2>
    <ul>

    {{ set currentYear = articleYear }}
  {{ /if }}

  {{# Render each article #}}
  <li>
    <article>
      <p>
        <time datetime="{{ article.date |> date('DATE') }}">
          {{ article.date |> date('HUMAN_DATE') }}
        </time> -
        <a href="{{ article.url }}">{{ article.title }}</a>
      </p>
    </article>
  </li>
{{ /for }}

{{# Close the last list tag if there were any articles #}}
{{ if articles.length > 0 }}
  </ul>
{{ /if }}
First, we get the list of articles and sort them in descending order based on date. We keep track of the year for each article in the currentYear variable and update it each time we find a new year:
{{ set articles = search.pages("blog_article", "date=desc") }}
{{ set currentYear = null }}

{{ for article of articles }}
  ...
{{ /for }}
For each article inside of the for loop, we want to check whether we've started a new year or not. If we have, we create new <h2> and <ul> elements, and if needed, close the previous <ul>. We also update currentYear:
  {{ set articleYear = article.date.getFullYear() }}

  {{ if articleYear != currentYear }}
    {{ if currentYear != null }}
      </ul>
    {{ /if }}

    <h2>{{ articleYear }}</h2>
    <ul>

    {{ set currentYear = articleYear }}
  {{ /if }}
Then, for each article, we generate a list element including the date and title:
<li>
  <article>
    <p>
      <time datetime="{{ article.date |> date('DATE') }}">
        {{ article.date |> date('HUMAN_DATE') }}
      </time> -
      <a href="{{ article.url }}">{{ article.title }}</a>
    </p>
  </article>
</li>
Here, |> is a Vento pipeline operator that converts article.date into a string with the proper format. date is referring to the Lume Date plugin that we added in _config.ts, and DATE and HUMAN_DATE are specific format options.
Running this with a single blog article md file, we get this:
Excellent! Lastly, we want every blog article to include the publication date at the top. To do this, we'll create src/_includes/blog_article.html.vto. It will be nearly identical to our main layout (which we can inherit), but before the content, we'll insert a single line with the date:
---
layout: main.html.vto
---

<em>{{ date |> date('HUMAN_DATE') }}</em><br />
{{ content }}
To make this the default layout for all blog articles, we create src/blog/_data.yml:
layout: blog_article.html.vto
Now, looking at the article in the browser, we get this:

Conclusion
Great! We've set up Lume, created layouts and styling templates, and built a dynamic blog. We finally have all of the same functionality that raw HTML/CSS/JavaScript has, but with a templating framework and live updates. Now we are free to focus on the actual content of the site.
In the next article, we'll look at designing a theme with a dynamic background using JavaScript and CSS.